")
If you’re just starting with Excel and asking how to do XLOOKUP, you’re not alone. XLOOKUP is one of Excel’s most useful functions, but beginners often feel unsure about where to start or how to write the formula correctly.
This beginner tutorial explains how to do XLOOKUP in Excel step by step, using simple examples and plain language. By the end, you’ll clearly understand how to do a XLOOKUP in Excel without confusion.
What Is XLOOKUP and Why Should Beginners Use It?
Before learning how to do an XLOOKUP, it helps to know why it exists.
XLOOKUP is used to:
- Find a value in a list or table
- Return related information from another column or row
- Replace older functions like VLOOKUP and HLOOKUP


For beginners, XLOOKUP is easier because:
- It uses exact matches by default
- It does not rely on column numbers
- It works left, right, up, and down
Step 1: Set Up Your Data in Excel
The first step in learning how to do XLOOKUP in Excel is preparing your data correctly.
A beginner-friendly dataset usually includes:
- One column with unique values (IDs, names, codes)
- Another column with related information (prices, departments, scores)
Make sure:
- There are no extra spaces in values
- Lookup and return columns have the same number of rows
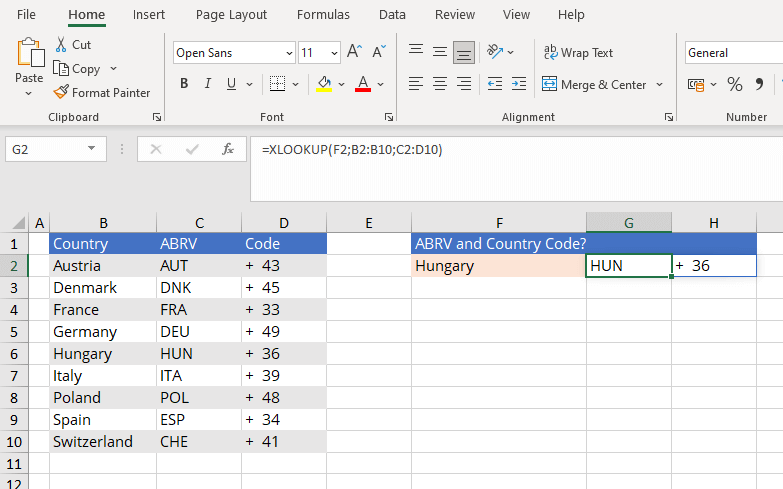
Step 2: Decide What You Want to Look Up
Next, choose the value you want Excel to find.
This value:
- Is usually stored in a separate cell
- Can be typed by a user
- Can change dynamically
For example, if cell E2 contains an employee ID, Excel will search for that ID.
This step is essential to understanding how to do a XLOOKUP properly.
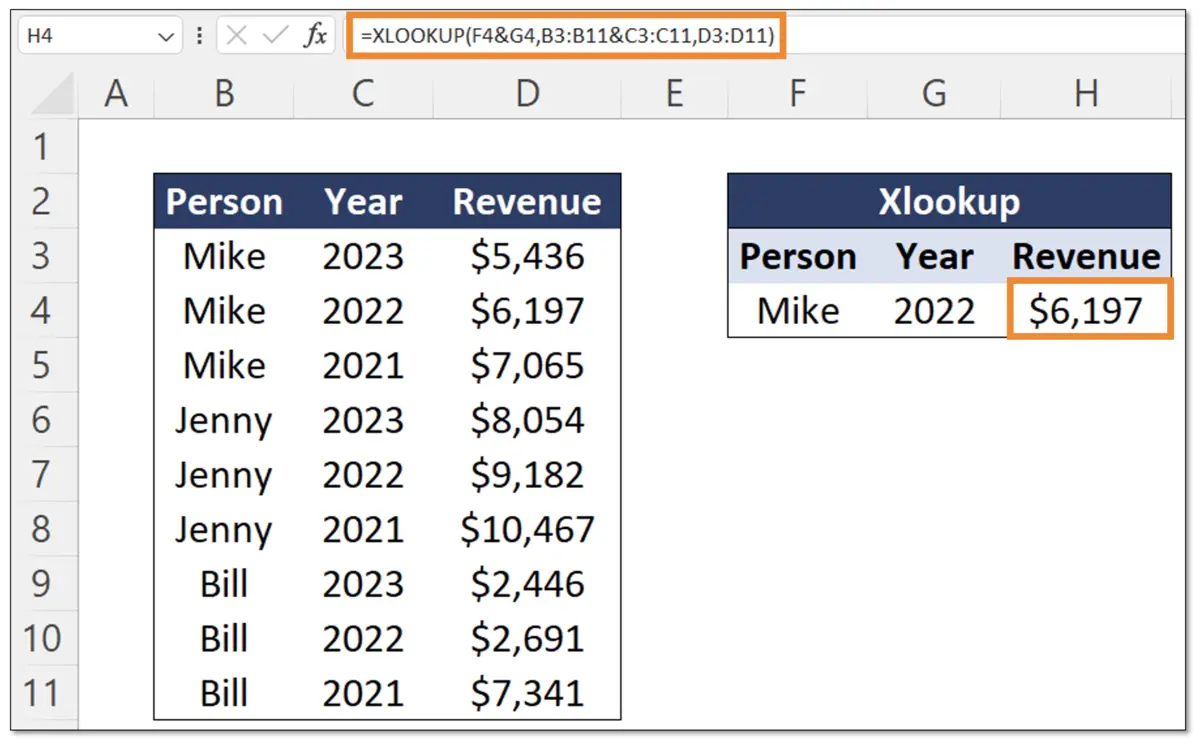
Step 3: Write Your First XLOOKUP Formula
Now comes the most important part of learning how to do XLOOKUP.
Basic XLOOKUP Formula
=XLOOKUP(lookup_value, lookup_array, return_array)
Beginner Example
=XLOOKUP(E2, A2:A10, B2:B10)
What This Formula Does
- Looks for the value in E2
- Searches column A
- Returns the matching value from column B
This simple formula covers most beginner use cases.
Step 4: Press Enter and Review the Result
Once you press Enter:
- Excel searches the lookup column
- Finds the first exact match
- Displays the related result

If the value exists, the result appears instantly.
Step 5: Handle “Not Found” Results (Beginner Tip)
When learning how to do XLOOKUP in Excel, beginners often encounter #N/A errors.
You can make your formula beginner-friendly by adding a message.
=XLOOKUP(E2, A2:A10, B2:B10, "Not Found")
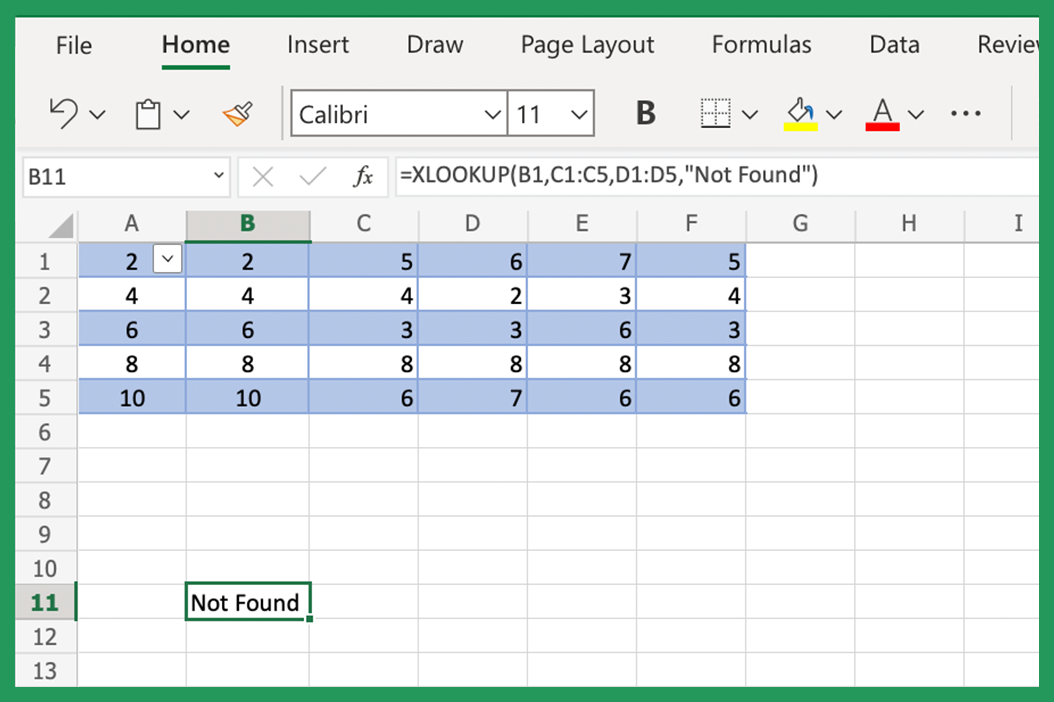
This improves readability and user experience.
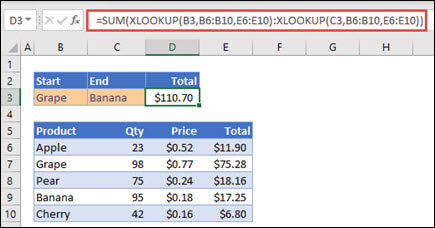
Step 6: How to Do a XLOOKUP to the Left
Older Excel functions couldn’t return values from the left. XLOOKUP can.
Example
=XLOOKUP(E2, B2:B10, A2:A10)

This flexibility is one reason beginners prefer XLOOKUP.
Common Beginner Mistakes to Avoid
When learning how to do XLOOKUP, beginners often:
- Select lookup and return ranges of different sizes
- Include headers in one range but not the other
- Type values directly instead of using cell references
Avoiding these mistakes makes XLOOKUP much easier to use.
Frequently Asked Questions
How to do XLOOKUP in Excel for beginners?
Start with clean data, use cell references, and keep lookup and return ranges aligned.
Is XLOOKUP hard to learn?
No, most beginners find it easier than VLOOKUP.
Can XLOOKUP return text and numbers?
Yes, it works with all common data types.
Does XLOOKUP need sorted data?
No, exact match is the default behavior.
How to do a XLOOKUP with large tables?
Use Excel tables and structured references.
Which Excel versions support XLOOKUP?
Excel 365 and Excel 2021 or newer.
Conclusion
Now you know how to do XLOOKUP, how to do XLOOKUP in Excel, and how to do a XLOOKUP in Excel as a beginner. With its simple syntax and flexible design, XLOOKUP is one of the easiest and most powerful Excel functions to learn early.
Once you master this function, many everyday Excel tasks become faster and more accurate.